ADD LINE ITEMS
There are three places to add line items.
- In Sketch you can place items directly on the floor plan.
- In Estimate Items you can locate items, add them to lists, and
organize by rooms.
- XactContents is generally only
used for contents claims.
The line-item entry method you choose will depend on you preference,
and the size and type of your estimate. In this scenario we will use the
Sketch and the Estimate Items methods
Add Bedroom line items
Add Living Room and Stairs line items
Add Hall line items
Add Bathroom line items
Add countertop
line items
Add sink line items and finish the kitchen
Related topics
Add Bedroom line items
For this room, we will use the Sketch interface to add our line items.
- Click Sketch.
- In the Search pane, click Search
Price List – Training.
- Click the cat code for painting line items, PNT.
- To paint the walls and ceiling, select PNTSP, and click within
the Bedroom .
- To clean an average-grade light fixture, type CLNLIT
in the Search box. Click Search.
- Select CLNLIT and click
within the Bedroom where you want to place a light fixture.
If there are multiple light fixtures, they cannot be placed on top
of each other. In this case there is only one light fixture in the
room, so click once near the center.
- To clean the windows, type CLNWD
in the Search box. Click Search.
- Select CLNWD.
 Different sized windows
require different CLNWD items. For example, for smaller than average windows
you would use the code CLNWD<. Use the corresponding measurements listed
in the items’ descriptions to determine which code is appropriate.
Different sized windows
require different CLNWD items. For example, for smaller than average windows
you would use the code CLNWD<. Use the corresponding measurements listed
in the items’ descriptions to determine which code is appropriate.
- By default, this line item cleans only one side of the window.
To clean both sides of the window, with CLNWD selected, right-click
one of the Bedroom windows to open the Add Line Item dialog box.
- Click Calc
 to
open the Calculator. Click 2,
and then click OK.
to
open the Calculator. Click 2,
and then click OK.
- Click OK in the Add Line
Item dialog box.
- Click each window in the Bedroom.
Add Living Room and Stairs line items
For the Living Room and Stairs, we will use the Estimate Items interface.
- Click Estimate Items.
- In the Grouping pane, select the Living
Room.
- Right-click in the Line Item List area.
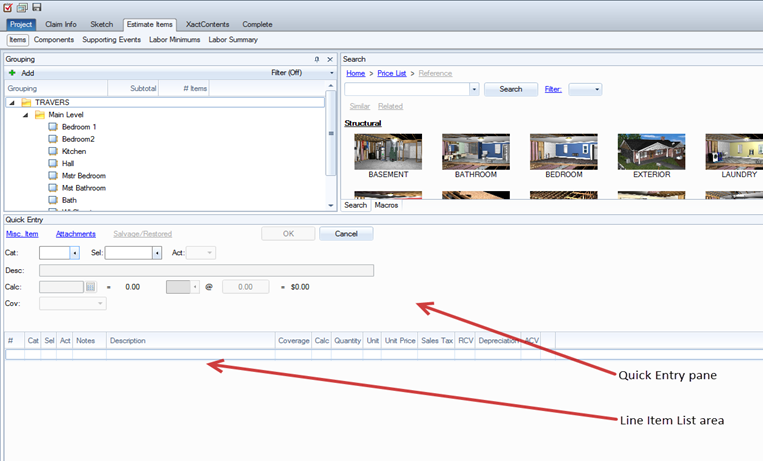
- Under Other Options, select Retrieve
Scope.
- Select the Bedroom, and
click OK.
- The living room has two light fixtures. Select CLN
LIT, change Calc to 2, and click OK.
- The living room only has two windows. Select CLN
WD, change Calc to 4, and click OK.
- Click Sketch.
- To add carpet, type FCCAV in the Search box. Click Search.
- Select FCCAV, and click
within the Living Room and Stairs.
- Press Esc
on your keyboard to clear FCCAV from your cursor.
- To add waterfall carpet installation:
- Right-click on the stairs and select Properties.
Find the number of risers listed under No. of risers in the Staircase
section. Remember this number; you will need it in a few steps.
- Click Estimate Items,
and ensure the Stairs are selected in the Grouping pane.
- In the Quick Entry pane, enter FCC
for Cat, STP for Sel,
and the number of risers for Calc.
- To add carpet pad, click
Sketch.
- Type FCCPAD in the Search
box. Click Search.
- Select FCCPAD, and click
within the Living Room and Stairs.
- Type CLNAV in the Search
box. Click Search.
- Select CLNAV, and right-click
the Stairs.
- To clean the walls but not the ceiling, click Calc
, and
select W. Click OK,
and then click OK again.
- Click within the Stairs.
- Type CLNLIT in the Search
box, and click Search.
- To add the clean light fixture line-item, select CLNLIT,
and click within the Stairs.
- Type CLNHR in the Search
box, and click Search.
- To add the clean handrail line-item, select CLNHR,
and click within the Stairs.
Add Hall line items
- Click Sketch.
- Type CLNAV in the Search
box. Click Search.
- Select CLNAV and click
within Hall.
- Using the same method, add the following line items:
- PNTSP – Seal/prime then paint
(2 coats )
- CLNLIT (x1) – Clean light fixture
- LITAV (x1) – Light fixture
- FCCAV – Carpet
- FCCPAD – Carpet pad
Add Bathroom line items
- Add the following line items to the Bathroom:
- CLNAV – Clean surface area
- CLNBAR – Clean light bar
- CLNSNK – Clean sink
- CLNTLT – Clean toilet
- CLNTUBSUR
– Clean tub and surround
- CLNF – Clean floor, strip and wax
- To clean the 3’ by 3’
mirrors, click Sketch.
- Search for and select CLNMIR.
Right-click within the Bathroom.
- Click Calc . Click 3, x,
3. Click OK.
- Click OK again. Then click within the Bathroom.
- The toilet paper holder, towel holder, and wash cloth holder are
considered bath accessories. To clean all three bath accessories,
search the CLNBAC line item, change Calc to 3, and add the item to
the Bathroom.
- To clean the vanity, search for and select CLNVAN. A square that
represents a vanity will appear under your cursor.
- Move the vanity to the southeast corner of the Bathroom and click
to place the vanity.
- After it is placed, the dimensions of the vanity can be adjusted
the same way the dimensions of a room are adjusted. Click and drag
the west end of the vanity until it is 3’
long.
Add countertop
line items
- To add the countertop,
load CABCTFL
on your cursor.
- Click to place the countertop
in the northwest corner of the Kitchen.
- Press Tab four times to
rotate the countertop
graphic.
- Click to place the countertop
along the north wall of the Kitchen, perpendicular to the first countertop.
- Click and drag the south side of the first countertop
until it is 7’ 9”
long.
- Click the east side of the second countertop
you created and drag it until it is 8’
9”
long.
Add sink line items and finish the kitchen
- The sink and faucet need to be removed, cleaned, and reset when
the countertop
is replaced. To add the clean sink line item, load CLNSNKDFA,
and click the north countertop
in front of the window.
- The sink will need to be removed and reset. To add this to the
sketch, load PLMSNKD and right-click on the north countertop.
- In the Add Line Item dialog box, set Act to R
Detach
and Reset.
Click OK.
- Place the sink graphic on the northern countertop.
- Repeat steps 2 – 4 for
the faucet
(PLMFAU)
and place it over the sink.
- To fix the small hole in the drywall,
load DRYPATCH.
- Click near the wall between the Kitchen and Living Room.
- To remove and replace the buckled underlayment, load FCVUL1/2
and click within the Kitchen.
- To replace the vinyl kitchen floor, load FCVAV and right-click
on the Kitchen.
- Change Act to + Replace.
We don't need to estimate replacing and removing for this item, since
the cost of removal is covered when the underlayment is torn
up.
- Click within the Kitchen to place the vinyl floor covering line
item.
Related topics