SKETCH THE FLOOR PLAN
Sketch the bedroom
Sketch the bathroom
Add a closet
Sketch the hallway
Sketch the living room
Sketch the kitchen
Sketch the stairs
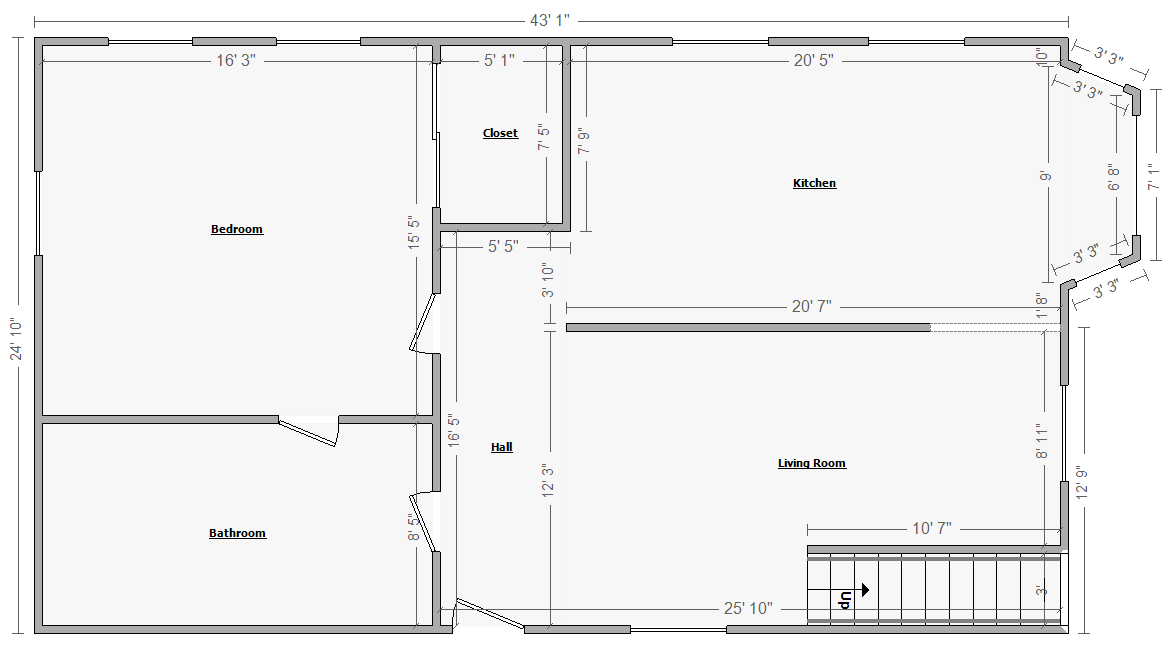
We will use the following floor plan to complete the estimate.
Sketch the bedroom
- Click Sketch.
- If you don't see the North arrow
 in
the Sketch workspace, click View.
Then select Legend.
in
the Sketch workspace, click View.
Then select Legend.
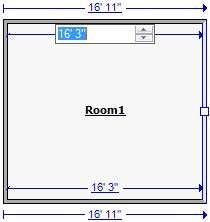
- On the sketch ribbon, click Room.
A 12'x12'
room will appear in your sketch workspace.
- Click and drag your cursor towards the southeast portion of the
workspace until the room has the interior dimensions of 16’
3”
by 15' 5".
- If you are having trouble getting the exact dimensions, do the
following:
- Click and drag the east wall until the north wall dimensions
appear.
- Click the interior dimension of the north wall.
- Type 16,3
in the box, and press Enter.
The comma separates feet from inches, making it easier for you
to manually enter measurements.
- Click and drag the south wall until the west wall dimensions
appear.
- Click the interior dimension of the west wall. Type 15,5
in the box, and press Enter.
- Click the room to select it. Then click the room label.
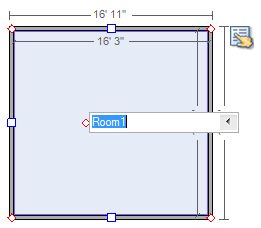
- Label the room Bedroom, and press Enter.
 Zooming
in can make it easier to set accurate dimensions. Learn more about zooming
in sketch.
Zooming
in can make it easier to set accurate dimensions. Learn more about zooming
in sketch.
Sketch the bathroom
- Click to select the south wall of the Bedroom.
- Holding Ctrl, drag the
south wall until the east wall of the new room is 8'
5"
long (interior dimension).
- Label the new room Bathroom.
Add a closet
- Press B on your keyboard,
or click Break in the sketch
ribbon.
- Click the east wall of the Bedroom, 7'
7"
(interior dimension) down from the north wall.
- Holding Ctrl, click and
drag the north section of the east wall to create a new room.
- Drag the east wall of the new room until the width of the room
is 5' 1"
(interior dimension).
- Right-click the new room, and select Properties.
- Name the room Closet.
- Under General, click Subgroup
Of and select Bedroom
to designate the closet a subgroup of the bedroom.
- Click anywhere on the Sketch workspace to close the Properties
window and save your changes.
If
you do not hold Ctrl, you will
not create a new room. Instead, the Bedroom will expand. If this happens,
press Ctrl-Z, or click Undo,
and try again.
Sketch the hallway
- Click to select the south wall of the closet.
- Holding Ctrl, click and
drag the wall until it snaps to the south wall of the Bathroom.
- Label the room Hall.
Sketch the living room
- Click to select the east wall of the hallway.
- Holding Ctrl, click and
drag the east wall of the hallway to the right until the interior
dimension of the north wall of the new room is 20’
5”.
- Click and drag the north wall until the interior dimension of the
east wall is 12’ 3”.
- Label the new room Living Room.
Always
lay out your sketch from one direction to another. Trying to draw exterior
rooms first and then adding interior rooms may cause an unhandled exception.
Sketch the kitchen
- Select the Room tool.
- Click in the upper right corner of the Closet to place the room.
- Drag the south wall of the new room until it snaps in place with
the north wall of the Living Room.
- Drag the east wall of the new room until it snaps in place with
the east wall of the Living Room.
- Label the room Kitchen.
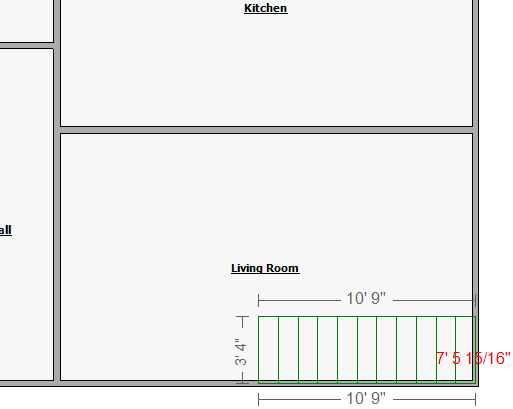
Sketch the stairs
- Press C or click Staircase.
- Place your cursor along the south wall of the Living Room, and
click 9' 8"
from the east wall to set the bottom step.

You may need to adjust
the orientation of the stairs before you set the first step. You can do
this by pressing the Tab button
on your keyboard.
- Move your cursor east, until it snaps to the east wall of the Living
Room. Click to set the top step.
- Right-click the Stairs,
and select Properties. Set
the Ceiling Type to Sloped.
- Set the Subgroup Of field to None.
- Click anywhere on the Sketch workspace to close the Properties
window and save your changes.